|
8/19/2018 Oil Change & Wheel SwapI have been super busy the last few months, and I have not had time to give my car the attention it deserves. I found some time yesterday so I jacked the car up using my wooden cribs with jack stands as a backup, and performed an oil change. Before an oil change I like to drive the car until it hits normal operating temperature so that the oil drains better. There is no need to rush as the oil will stay hot for a long time, I got it in the air and ready to drain the oil in about 45 minutes and the oil was still very hot (be careful not to burn yourself). I then let it drain for at least an hour.
5/23/2018 Manual Radiator Fan w/ an OEM SwitchIn preparation for my summer detail and service, I have decided to finally permanently install the radiator fan switch I wired last year. The switch manually triggers the high fans to help keep the car cool before it gets too hot, which is especially useful around town and in traffic. It is a simply modification, but it get can get complicated if like me you want to use OEM Porsche switches to trigger the fan. This is because Porsche used momentary switches that trigger action by relays, unlike a regular on/off switch that stays set to on or off, a momentary switch only sends a signal, it doesn't stay in the on or off position. Figuring out how to make this work sent me down several rabbit holes, and I have to thank Particlewave & Sandy who's posts helped me figure this out.
4/18/2018 Heated Seats w/ OEM SwitchesThis is one I have been trying to figure out for years. It wasn't until I really took the time to get into the electronics of the 986, that I was finally able to figure it out. I won't be doing this mod anytime soon, so it has not been tested, but I wanted to share, since I find some of the other heated seat directions that use OEM switches to be very confusing. Since this is untested, use these instructions at your own discretion, I take no responsibility for whether this will work on not, but I think it should.
2/14/2018 RTS Install 2018Lift tickets are so expensive these days, I finally caved and bought a season pass for some spring skiing. To take my mind off of much a season pass costs, I installed my RTS (Roof Transport System), along with a new Porsche Ski Rack. I bought the rack last year but had never installed it before. It fits the horizantal bar rails perfectly, since it was made to pair with all Porsche roof racks. The only modification I need to make is that only one side of the rack is clamped down to the rails, so it rattles when empty. I need to slip a neoprene washer or some felt on the other end. I also like that this rack catches a lot less wind than my ski box, which is top heavy and ruins the handling.
8/12/2017 Quick Detail, Mini Countryman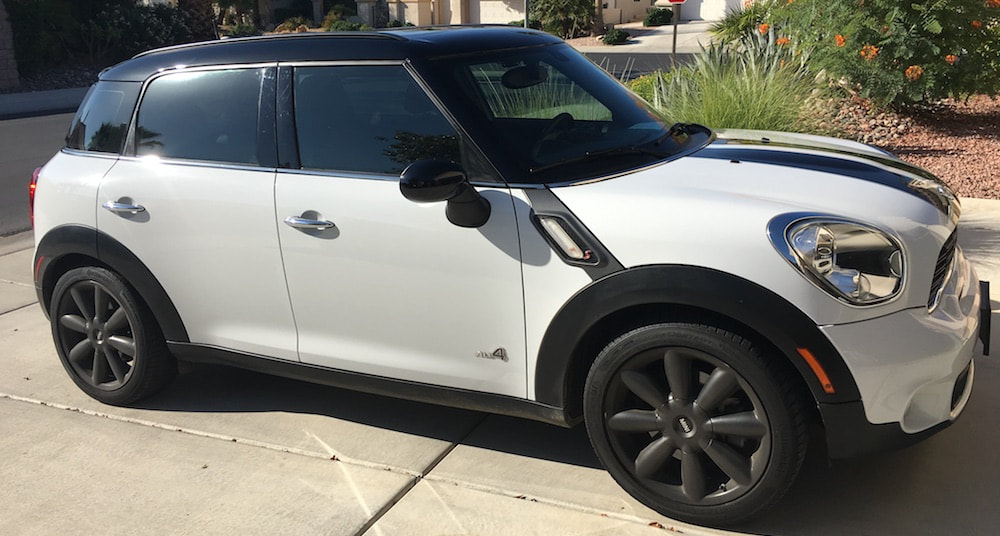 Last week I helped a family member move, which delayed wrapping up my Boxster detail by a few days. Since I have been on a detailing kick this summer, I decided to do a quick detail on their car since they where leaving a garage behind for outdoor covered parking. The interior was off limits and loaded with boxes, but I did do what I could to take care of the paint and exterior.
8/12/2017 Detail Day 13-15, wax & sealantMy 2-week 986 detail is now complete. After allowing the touch-up paint to cure for 3 days, I applied a coat of Wolfgang Deep Gloss Sealant to the entire car. The sealant requires at least 12 hours to cure between coats. I applied 3 coats which took 2 days, then finished with a coat of Collinite 845 liquid wax. I applied the sealant and wax by hand using a pad grip with a 4" red foam pad. I may look into a slightly less absorbent pad to use in the future, because the pad absorbed a lot of the product, but besides that it is a straight forward application.
7/29/2017 Detail Day 12 - touch-upToday, I started to work on the various chips and scratches around the car. After my bad experience with the OEM touch-up paint almost 10 years ago, I have avoided doing any more touch-up repairs. However, I saw Dr. Colorchip mentioned online as a good touch-up solution, so I purchased one of their kits.
7/25/2017 Detail Day 11, hardtopI had removed the hardtop while I worked on the body of the car due to the 1-2" overhang around the clamshell. Once reinstalled, the top presents a few challenges. First, my hardtop has several scratches from the previous owner who had stored the top without a cover, and then leaned a ladder up against it. When I purchased it almost 10 years ago, I used OEM Porsche Touch Up Paint to try and repair the damage, and did an very poor job. I made the scratches much, much worse, including installing more scratches when I attempted to wet sand the touchup paint.
7/23/2017 Detail Day 8-10, compound and polishAs I mentioned before, I severely under estimated the time required to do a two step paint correction. I just finished, and I would say I spent about 12 hours total on the paint. Compounding was fairly straightforward, and worked well using the microfiber cutting discs and D300 compound. However, I found the thin 5" pads are difficult to use everywhere other than the hood, as almost every panel of the 986 is curved. Even the door panels have a concave curve that made using the thin pads troublesome. I think I will probably use an orange foam pad next time. As a beginner, I think the thicker pad will be more forgiving and easier to use, which will help me achieve better results.
7/17/2017 Detail Day 7 - paint correctionLet me start by saying, I totally underestimated the amount of work a two step paint correction would be. I started very slowly and have been taking my time. I started by cleaning the panel with Optimum Paint Prep to make sure there was nothing on the panel that could get into a microfiber or foam pads and cause scratches. I then tested a white foam polishing pad with Menzerna SF3500 finishing polish. It took out a lot of the minor scratches, but was not taking out the bigger ones. After that first test, I felt confident I was not dealing with soft paint, so I went to a microfiber cutting pad with D300 compound.
|
Disclaimer
This website is a personal project, and any information contained on this website should be independently verified. I accept no liability and/or responsibility for the accuracy of any information on this website, and/or any damage you incur from reading or following any of the information on this website. This website contains documentation of my own modifications, upgrades, and other work, however your results may differ. I encourage everyone to do their own research and verify any information themselves. This website may be directly linked to without specific permission, but the contents may not be copied, hosted, transmitted, etc in any medium without express permission. Thank you! |
 RSS Feed
